
Outdoor Photography That Highlights Distance and Perspective
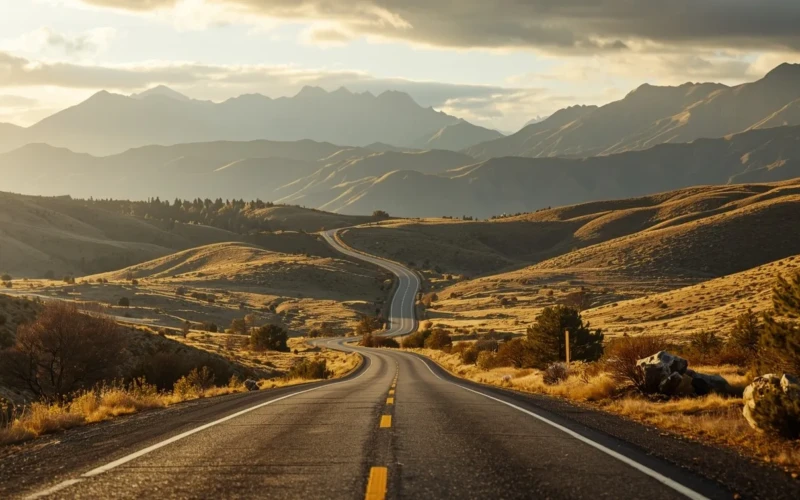
Outdoor Photography is more than just taking pictures outside. It is about showing how big or small a place feels and how far things are from each other. When you photograph distance and perspective, your photos start to tell a deeper story. A simple road can look endless, and a mountain can feel even more powerful. By paying attention to angles and space, you can make your images more exciting. Outdoor Photography helps you turn normal views into scenes that truly stand out.
Understanding distance and perspective can change the way you see the world. When you move closer or step farther back, everything in your frame shifts. Lines, shapes, and layers begin to guide the viewer’s eyes through the photo. Even small changes in position can create a strong sense of depth. With practice, you will notice how foreground and background work together. In the end, it’s all about using space wisely to create photos that feel alive and full of meaning.
Why Distance Makes Photography More Powerful
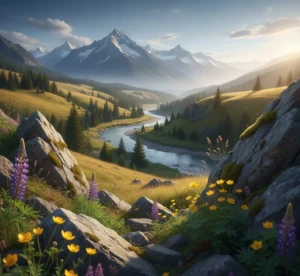
Distance plays a key role in making your outdoor photography more powerful. It helps show the scale of a scene, making mountains look taller or roads look longer. When you take distance in your photos, it gives viewers a sense of space and openness, which makes the image more engaging. Objects placed far apart can create a feeling of adventure or mystery. By thinking about how far your subjects are from each other, you can tell a story without words. Even a simple landscape can feel more dramatic when distance is photographed well.
Understanding distance also helps guide the viewer’s eye through the photo. When used correctly, it creates a natural flow from the foreground to the background, making the image more dynamic. You can also highlight contrasts between near and far objects to emphasize depth. Distance can turn ordinary scenes into memorable shots by giving them a three-dimensional feel. Paying attention to space between elements allows you to create photos that feel alive and full of energy.
Here are some tips to use distance effectively in your outdoor photography:
- Use wide-angle lenses to include more space in your frame.
- Include a small object in the foreground to show how far other objects are.
- Experiment with long shots to make a scene feel grand and expansive.
- Step back from your subject to photograph the full environment.
- Layer your shots with foreground, middle ground, and background to create depth.
Using Perspective to Add Depth
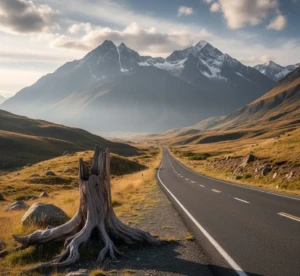
Perspective is one of the most powerful tools in outdoor photography to make your images feel alive and three-dimensional. By changing the angle or position of your camera, you can guide the viewer’s eye through the scene and highlight the distance between objects. Perspective can make a simple path look endless, a river seem winding, or a mountain appear taller. It’s not just about what’s in the frame, but how the elements relate to each other. Small changes in position can create big differences in how your photo feels and tells a story. Using perspective effectively can turn ordinary landscapes into dramatic, eye-catching shots. You can play with lines, shapes, and layers to create a sense of depth and movement.
The foreground, middle ground, and background work together to draw attention to the subject and make the scene more engaging. Even everyday outdoor locations can look extraordinary when you consider perspective carefully.
Here are some tips to use perspective in your outdoor photography:
- Shoot from a low angle to make objects in the distance appear taller.
- Use leading lines like roads, fences, or rivers to guide the viewer’s eye.
- Change your position often to discover new ways to show depth.
- Include elements at different distances to create layers.
- Experiment with wide and telephoto lenses to see how perspective changes the scene.
Simple Camera Angles That Improve Outdoor Photography
Choosing the right camera angle can completely change your outdoor photography. Small adjustments in height, tilt, or distance can make a scene feel bigger, more dramatic, or more interesting. Shooting from eye level often gives a natural view, while going lower can make objects appear larger and more powerful. High angles can show patterns, shapes, or the full layout of a landscape. By experimenting with different angles, you can find fresh ways to show familiar places.
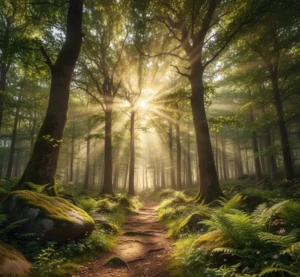
Angles also help emphasize distance and perspective in your photos. Tilting your camera slightly up or down can highlight depth, while moving left or right can reveal hidden layers in a scene. Angles allow you to play with light and shadows, adding texture and mood to your images. Changing your viewpoint keeps your photography creative and engaging, making even simple outdoor locations look extraordinary.
Here are some tips for using camera angles in outdoor photography:
- Shoot from a low angle to make objects appear taller and more dramatic.
- Try high-angle shots to photograph patterns or the full landscape.
- Move around your subject to find unique perspectives.
- Tilt your camera slightly to add depth and dimension.
- Combine angles with foreground objects to guide the viewer’s eye through the scene.
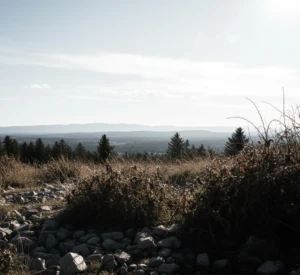
Foreground and Background Tips for Better Photos
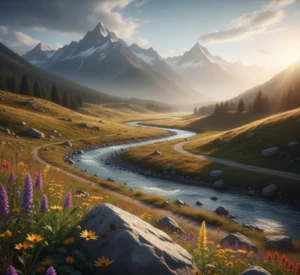
Using foreground and background effectively can take your outdoor photography to the next level. The foreground adds depth and context, giving your viewers something to focus on first. The background sets the scene and can improve the mood of your photo. Balancing both to make your images feel complete and three-dimensional. A well-chosen foreground can make distant mountains, rivers, or buildings feel even more impressive. Paying attention to what’s in front and behind your subject makes your shots more engaging and visually appealing. Foreground and background also help guide the viewer’s eye through the photo. By layering elements from near to far, you create a natural flow that makes the image feel alive.
It’s important to avoid clutter that can distract from the main subject, while still keeping the scene interesting. Using contrasting colors, textures, or shapes in the foreground and background can improve depth and perspective. Even small adjustments, like moving a step forward or backward, can transform a flat image into a dynamic one.
Here are some tips for working with foreground and background in outdoor photography:
- Include interesting objects in the foreground like rocks, plants, or pathways.
- Keep the background simple to avoid distractions from the main subject.
- Use layers to create depth, from foreground to middle ground to background.
- Look for contrast in colors or textures to make elements stand out.
- Step around and experiment to find the best combination of foreground and background.
Common Mistakes to Avoid in Outdoor Photography
Outdoor photography can be exciting, but small mistakes can make even beautiful scenes look flat or uninteresting. One common error is ignoring distance and perspective, which can make photos feel two-dimensional. Another mistake is cluttered compositions, where too many elements distract from the main subject. Overexposure or underexposure is also frequent, causing loss of details in bright skies or dark shadows. Paying attention to these factors can instantly improve the quality of your shots.
Other mistakes often happen when photographers don’t plan their angles or consider foreground and background. Shooting from the same eye-level angle all the time can make images feel repetitive. Not using leading lines or natural frames can result in photos that lack direction or focus. Even forgetting to check the horizon line can make landscapes look tilted or unbalanced. Being aware of these pitfalls helps you take more striking and professional-looking outdoor photos.
Tips to avoid common mistakes in outdoor photography:
- Check your exposure to preserve details in highlights and shadows.
- Plan your composition and think about distance, perspective, and layers.
- Use foreground and background wisely to create depth.
- Experiment with different angles instead of always shooting at eye level.
- Keep your horizon straight to maintain balance in landscapes.
- Avoid cluttered scenes by removing unnecessary objects from the frame.
Conclusion
Outdoor Photography that highlights distance and perspective can completely change the way we see the world around us. By paying attention to space, angles, and layers, you can turn simple landscapes into stunning, eye-catching images. Small changes in position, camera angle, or foreground elements can make a huge difference in how your photos feel. The best part is that anyone can practice these techniques and see instant improvement in their shots. Now it’s your turn, try experimenting with distance, perspective, and angles in your own outdoor photography. Share your favorite tips or photos in the comments below and let’s inspire each other to photograph more breathtaking views.
Read Next: Professional Photo Editing Services Designed for Photographers