
How to Use Aurora HDR for Real Estate Photography Like A Pro
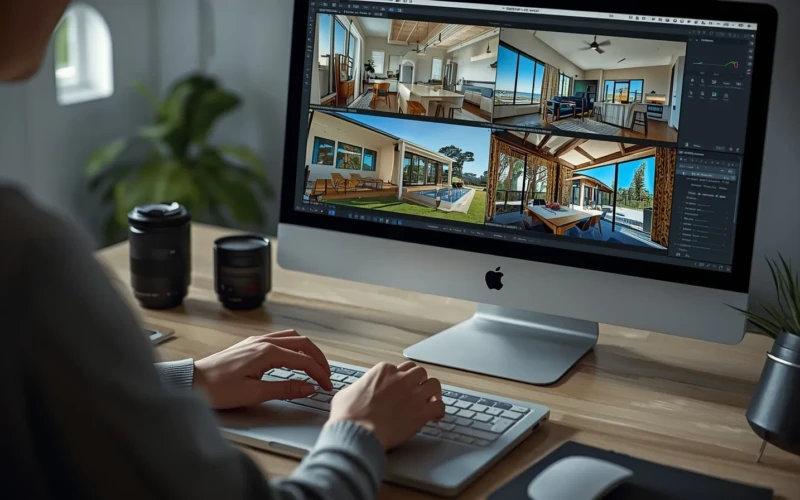
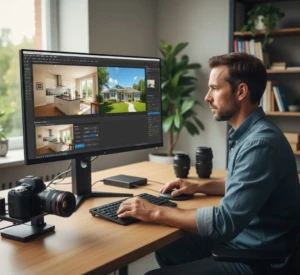
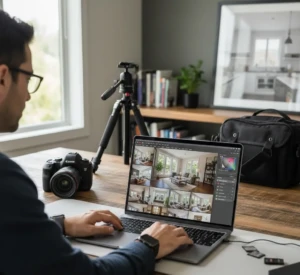
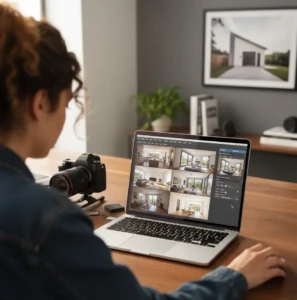
Taking great real estate photos can make all the difference in attracting buyers and selling properties faster. One of the best tools for achieving professional-looking images is Aurora HDR for real estate photography. This software helps you bring out the perfect balance of light and detail in every shot, even in tricky lighting conditions. With HDR (High Dynamic Range) processing, you can highlight both the bright areas and shadows, making rooms and outdoor spaces look more inviting. Using Aurora HDR can transform ordinary photos into eye-catching visuals that truly showcase a property’s potential. Even beginners can start creating polished, professional images with just a few adjustments.
Mastering real estate photography is not only about having the right tools but also knowing how to use them effectively. Aurora HDR allows you to improve textures, colors, and lighting while keeping the images natural and realistic. You can fix overexposed windows, bring out details in darker corners, and make spaces feel larger and brighter. Learning the key features and techniques will help you consistently produce high-quality photos that impress clients. In this guide, we’ll walk you through practical tips and tricks to use Aurora HDR for real estate like a pro. By the end, you’ll be able to create images that make properties stand out and catch the attention of potential buyers.
Why Aurora HDR for Real Estate Can Change Your Photos
High-quality real estate photos can make a huge difference in attracting potential buyers, and this is where Aurora HDR for real estate really shines. Unlike standard photo editing software, Aurora HDR is designed to handle tricky lighting conditions, such as bright windows and dark corners, by blending multiple exposures into a single, balanced image. This allows every room and outdoor space to appear clear, vibrant, and inviting. With the right adjustments, your photos can take the true feeling of a property, making it easier for clients to imagine themselves living there. Even if you are new to HDR photography, Aurora HDR simplifies the process with user-friendly tools and smart presets.
Using Aurora HDR also gives your photos a professional edge that stands out from typical real estate listings. You can improve colors, sharpen textures, and adjust brightness to create images that feel natural yet polished. Consistent editing across multiple photos makes your listings look cohesive and appealing.
To get the best results, here are a few practical tips:
- Use multiple exposures, when possible, to get full detail in bright and dark areas
- Start with built-in presets to speed up the editing process
- Adjust highlights and shadows carefully to avoid over-editing
- Keep colors natural to make the property look realistic
- Crop and straighten images for a clean and professional presentation
Preparing Your Photos for the Best Results with Aurora HDR for Real Estate
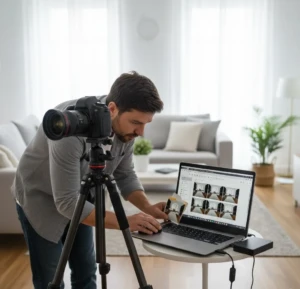
Preparing your photos properly is the first step to creating stunning real estate images with Aurora HDR for real estate. Before you even open the software, having well-shot photos makes the editing process much smoother and more effective. Start by getting multiple exposures of each scene, this allows HDR to blend light and shadows perfectly. Make sure your camera settings are consistent, your angles are straight, and your composition highlights the property’s best features. Organized and clear photos save you time during editing and make sure you get the most out of Aurora HDR’s tools. Small adjustments before editing can make a big difference in the final image.
Pay attention to lighting, framing, and clarity while shooting, and remove any distractions in the room. Using a tripod can help keep shots steady and aligned, especially when taking multiple exposures.
Here are some tips for preparing your photos:
- Shoot in RAW format for better editing flexibility
- Use a tripod to maintain consistent framing
- Take multiple exposures for HDR blending
- Make sure that rooms are tidy and free of distractions
- Keep lighting as natural and even as possible
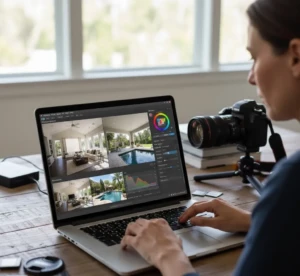
Adjusting Light and Color to Make Spaces Stand Out
Lighting and color play a huge role in how appealing a property looks in photos. With Aurora HDR for real estate, you can easily improve both to make every room and outdoor space shine. Adjusting the brightness, contrast, and saturation helps highlight key features like large windows, polished floors, or vibrant landscaping. At the same time, you can balance shadows and highlights so that no areas appear too dark or washed out. Proper adjustments make spaces feel bigger, brighter, and more inviting, which can leave a lasting impression on potential buyers.

Color correction is also important for creating natural and attractive images. Aurora HDR allows you to tweak white balance, vibrance, and tone curves to make colors pop without looking artificial. Simple changes can transform a dull photo into a lively and appealing listing.
To get the best results, consider these tips:
- Adjust exposure to brighten rooms while keeping highlights under control
- Balance shadows and highlights to reveal full detail
- Correct white balance for natural-looking light
- Improve vibrance slightly to make colors pop, but keep them realistic
- Use tone curves to fine-tune contrast and depth
Overcoming Common Real Estate Photo Challenges with Aurora HDR for Real Estate
Real estate photography often comes with challenges like bright windows, dark corners, or uneven lighting. Aurora HDR for real estate makes it easier to fix these issues and create professional-looking images. By blending multiple exposures, you can photograph every detail in both bright and dark areas, making sure that nothing gets lost. This helps rooms appear balanced, inviting, and true to life. Even tricky situations, like backlit interiors or heavily shadowed corners, can be corrected with just a few adjustments. Other common issues, such as distorted perspectives or color inconsistencies, can also be improved in Aurora HDR. Using its editing tools carefully keeps photos natural while improving the overall quality.
Here are some practical tips to overcome common challenges:
- Use multiple exposures to get full dynamic range
- Adjust highlights to prevent bright areas from looking washed out
- Brighten shadows without overexposing the lighter areas
- Correct color casts for consistent, natural tones
- Straighten and crop images to maintain clean, professional framing
Using Presets and Tools to Save Time and Stay Consistent
Editing multiple real estate photos can be time-consuming, but Aurora HDR for real estate offers presets and tools that make the process faster and easier. Presets are pre-made settings that instantly improve your images with balanced lighting, color, and contrast. They help you achieve a professional look without spending hours adjusting every detail. Using presets consistently across all your photos also creates a unified and polished appearance for your listings, which can make your brand look more professional and trustworthy.
Aurora HDR also provides powerful tools that allow you to fine-tune each image after applying a preset. You can adjust exposure, highlights, shadows, and color balance to suit the specific needs of each photo. These tools help you maintain a natural and realistic look while saving time.
Here are some tips to make the most of presets and editing tools:
- Start with a preset that matches the style of your property photos
- Adjust exposure and highlights as needed after applying the preset
- Use color correction tools to keep tones natural and consistent
- Apply the same preset to similar shots for a cohesive look
- Experiment with local adjustments to improve specific areas without over-editing
Tips for Showcasing Properties Like a Pro
Showcasing properties effectively requires more than just taking photos, it’s about highlighting the best features and making spaces feel inviting. With Aurora HDR for real estate, you can create images that truly stand out and get the attention of potential buyers. Using HDR techniques, you can balance light and shadow, improve textures, and make rooms appear brighter and more spacious.
The goal is to make each photo tell a story and showcase the property in its best light. Small details can make a big difference in real estate photography.
Here are some practical tips to present properties like a pro:
- Highlight key features such as kitchens, living areas, and outdoor spaces
- Keep lines straight and perspectives natural using cropping and alignment tools
- Make rooms look bright and inviting without over-editing
- Show the flow of the property by including wide-angle shots and complementary details
- Maintain a consistent style and color tone across all photos
Conclusion
Mastering real estate photography with Aurora HDR for real estate can completely change the way your listings look and attract buyers. By balancing light, improving colors, and fixing common photo challenges, you can create images that make properties feel bright, inviting, and professional. Even small adjustments, like using presets or correcting shadows, can make a big difference in how clients perceive a space. Consistency across your photos builds a stronger brand and makes your listings more appealing. Have you tried using HDR for your real estate photos, or do you have a favorite editing trick? Share your thoughts or experiences in the comments below and let’s help each other take property photography to the next level.
Read Next: Why Professional Apparel Photo Editing Boost Clothing Sales